Setting up your Adam Internet email in Windows 10 Mail
Do you need help setting up Adam Internet email in Windows 10 Mail? By following these simple steps, you can get your Adam Internet email up-and-running in Windows 10 Mail in no time at all!
If you're still having difficulty getting your email client set-up, you can always call Adam Internet support on 131313.
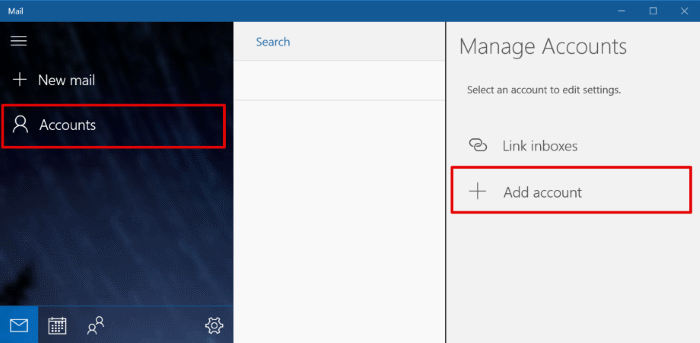
Step 1. Open Windows 10 Mail, select "Accounts", and from the menu that appears, select "Add Account".
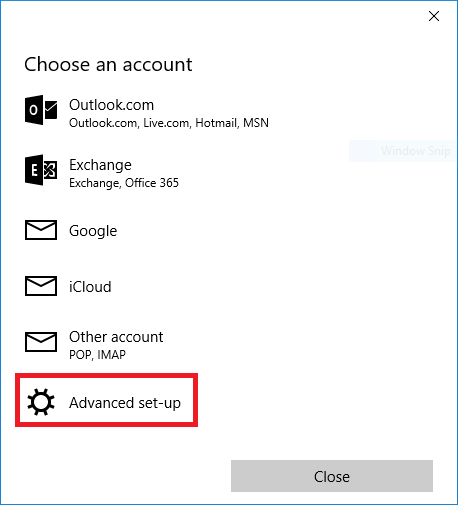
Step 2. Choose the "Advanced set-up" option.
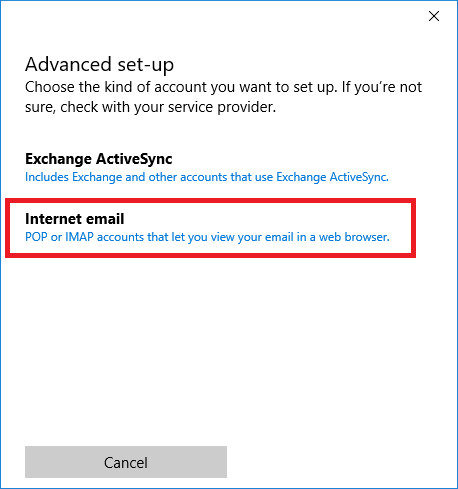
Step 3. At the Advanced Set-Up screen, choose the account type "Internet email"
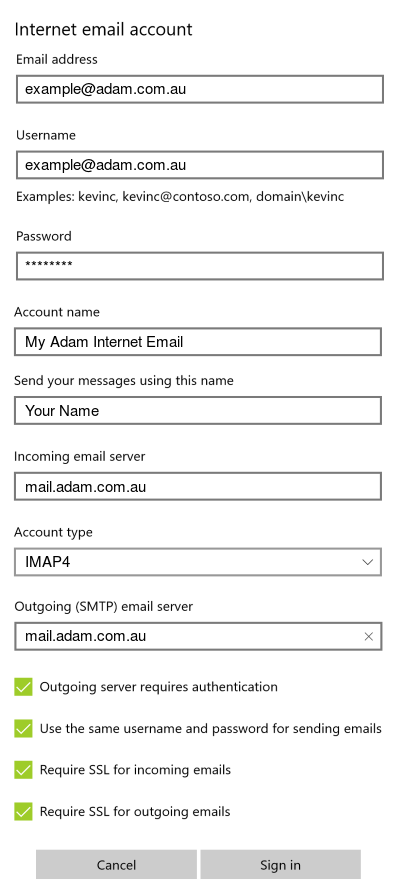
Step 4.
- Enter your email address in the Email address and Username fields.
- Enter your password.
- Set an Account Name you'll remember, for example My Adam Internet Email.
- Enter your name in the Send messages using this name field.
- For Incoming email server, enter mail.adam.com.au
- At the Account type dropdown, choose IMAP4
- In the Outgoing (SMTP) email server field, enter mail.adam.com.au
Congratulations! You can now use your Adam Internet email in Windows 10 Mail
Has our website helped your set up your Adam Internet email? Donate today to help keep it alive!